
How to build a FlipBooKit (quick overview)
READY? Let’s Build!
Congratulations on your new Craft FlipBooKit! If reading a page of pictured instructions isn’t your bag, here’s a cute stop-motion that will give you a quick overview of the steps. (see video to the left).
Want more details? Here’s a very human demo from master-craft-instructor, Barb Noren. She gives great tips to anyone who is supervising kids building FlipBooKits, and shows how to make the original Black and Legacy-Craft versions.
Already have it built? Here’s Barb’s instructable about how to make your own animation.
Missing Instruction Sheet? If you need a replacement, here’s the FlipBooKit 2-page instruction (PDF) that comes with every FlipBooKit

What comes in the box?
FlipBooKit Box – folded box
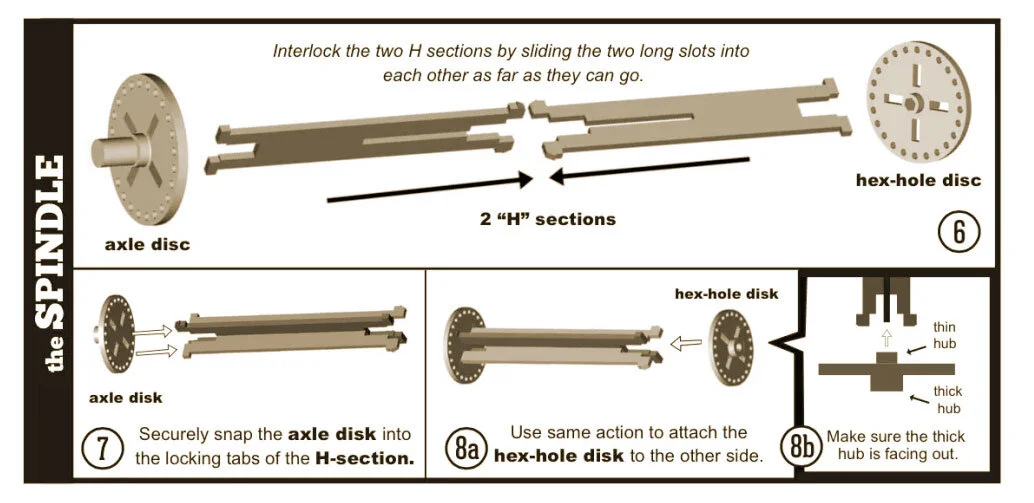
Spindle Assembly (black plastic parts in a bag)
(1) Hex-Hole Disk
(1) Axle Disk
(2) “H” sections
(2) Plastic Bushings
(1) Crank Handle
(1) Plastic Flipper
Blank Flip Cards – 24 cards* (four die-cut plastic sheets)
Printable Labels – 5 letter-sized sheets* (one extra sheet – just in case) *alternately, some kits may contain pre-printed cards
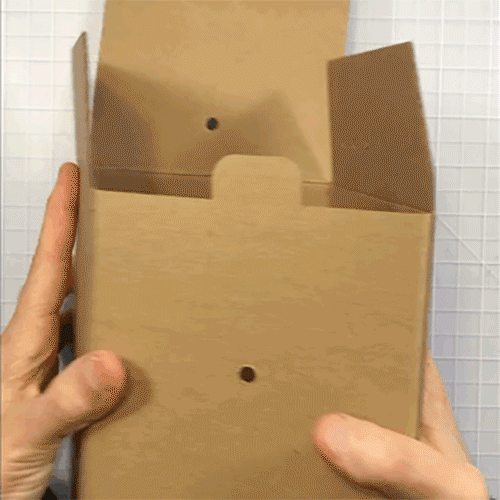
Step 1:
Pop-up Box

Step 2:
Easy parts assembly
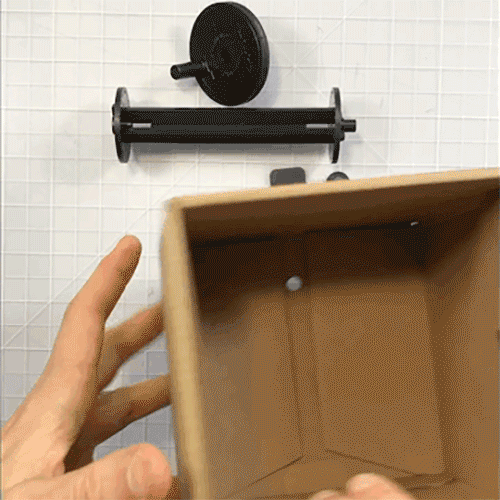
Step 3:
Spindle and Crank
Detailed Step-by-step Instructions


Flipbookit Legacy Model…
.
do you have rivet fasteners?
We are constantly working to improve the product, and have eliminated rivet fasteners. If you bought one of these models, these legacy guides will make building your FlipBooKit a snap!
• Link to the FlipBooKit instructable – with step-by-step photos and Barb’s special teaching tips
• Intructors’ download of the Instructable super-detailed step-by-step PDF with many photos
• If you need a replacement, here’s the FlipBooKit 2-page instruction (PDF) comes with every FlipBooKit